Uploading the index file - Make sure your website displays correctly
The index file is often the first page visitors see when they land on your website. It's essential to have it uploaded correctly to ensure your site displays as intended. We'll show you how to locate the index file on your computer and transfer it to the appropriate directory on your server using FileZilla.
You can follow this tutorial to upload the files to your hosting account.
1. Open FileZilla FTP Client.
2. Enter your FTP host, username, and password. You can use your cPanel username and password as your FTP user and password. Then click on Quick Connect.
- Enter your domain name in the Host field, such as ftp.example.com or example.com.

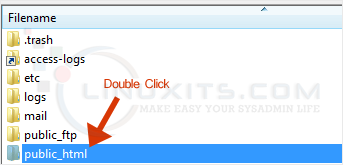
3. Make sure that you are inside the public_html folder, if not then double click on it to go to the public_html folder. 
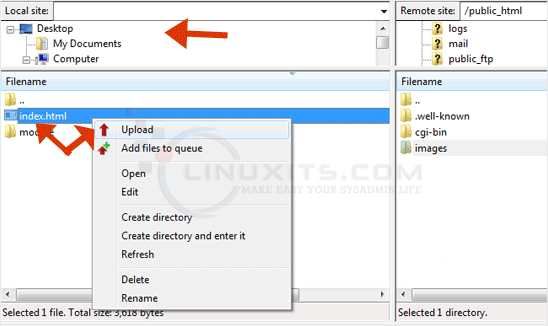
4. Under Local Site in FileZilla, open the directory where your website files are located. Right-click on your index file and choose Upload. 
You can view the progress of the upload in FileZilla.
Once the upload is complete, go to a web browser and type in your domain name followed by "/index.html" (or whatever extension you used for your index file). If everything was successful, you should see your website's homepage displayed.


