
Step-by-step guide to setting custom/private nameservers in WHM
This article will walk you through the process of setting up custom/private nameservers in WHM. From logging into your WHM panel to configuring DNS zones, we provide detailed instructions and screenshots to ensure a smooth setup experience.
You can set up custom/private nameservers from WHM.
1. Log in to WHM Account.
2. Go to Server Configuration >> Basic WebHost Manager® Setup or type Basic in the menu filter box. The option will appear. Click on it . 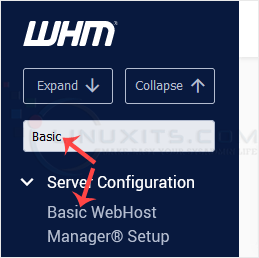
3. Under Nameservers, select Explicitly Set the Nameservers. Enter or change the nameservers. Then click on Save Changes. 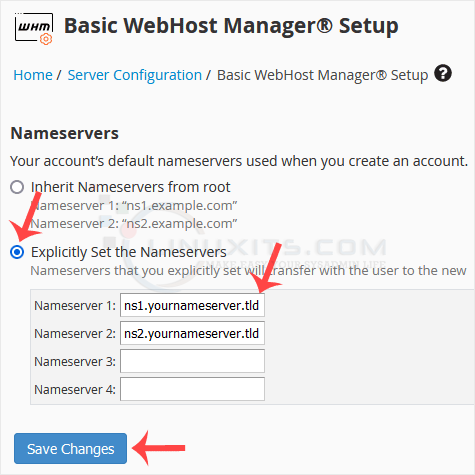
Note: Domain propagation takes up to 24 hours.
By following these guidelines and implementing custom/private nameservers in WHM, you can elevate your online presence, enhance branding, and take full control of your website's DNS management.
