Step-by-step guide to installing WordPress on SiteWorx
Installing WordPress on SiteWorx can seem daunting, but with our easy-to-follow guide, you'll be up and running in no time. Learn how to navigate Softaculous and make the most out of this powerful tool.
Softaculous helps you install web applications very easy. Please, follow the steps below to install WordPress.
1. Log in to your SiteWorx account.
2. In the Additional Features section, click on Sofataculous. ![]()
3. SiteWorx will redirect you to the Softaculous interface.
4. On the left side, locate the Blogs category. Click on it and then on the WordPress link that appears. 
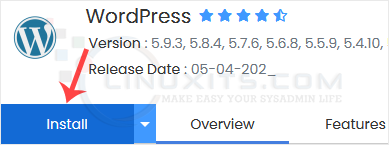
5. Click on Install. 
6. Fill in the necessary fields under the Software Setup fields:
-
- Choose Installation URL: Choose the appropriate protocol/domain. Inside the "In Directory" field, should you want to install this in a directory, i.e., example.com/directory, enter the directory name. Otherwise, please, leave it blank to install in your main domain, i.e., example.com.
- Choose the version you want to install: You can leave this as it is.

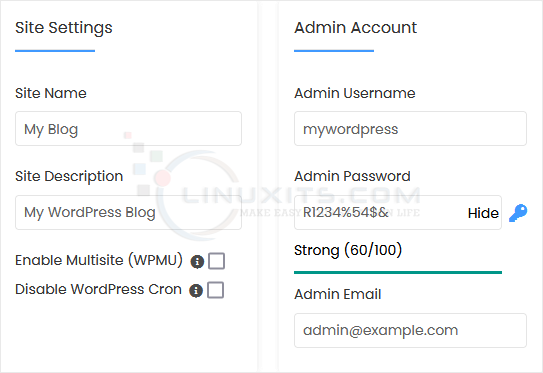
7. Under the Site Settings field, enter the following information:
- Site Name: Enter the name of your website, such as my first website.
- Site Description: Your site description.
- Enable Multisite (WPMU): Leave this as it is.
8. Under the Admin Account field, enter the following information:
- Admin Username: Your new WordPress username (for security reasons, do not use the administrator or the admin username).
- Admin Password: Use a strong password.
- Admin Email: Your e-mail address.

Note: Copy the admin username and password to Notepad. You will need those to access the admin area of your WordPress blog later.
9. Choose Language: You can choose the language of your WordPress blog. The default language of WordPress is English. 
10. Select Plugin(s): You can skip this or select plugins you wish to install.
11. Advanced Options: Leave this unless you want to change the database name or take an automated backup. Please, note that creating frequent backups may take a lot of disk space.
12. Select Theme: You can select any available theme. If you do not want to do this, leave it, and WordPress will use its default theme.
Finally, scroll down to the end of the page and click on Install. 
By following our comprehensive tutorial on installing WordPress via Softaculous in SiteWorx, you'll gain the necessary knowledge and skills to create a professional-looking website for your business without any hassle.


