Step-by-step guide to installing FlatPress using Softaculous in SiteWorx
Installing FlatPress through Softaculous in SiteWorx is a simple and efficient way to set up your blogging platform. Follow this comprehensive guide to successfully install FlatPress and start sharing your thoughts with the world.
Softaculous helps you install web applications very easy. Please, follow the steps below to install FlatPress.
1. Log in to your SiteWorx account.
2. In the Additional Features section, click on Sofataculous. ![]()
3. SiteWorx will redirect you to the Softaculous interface.
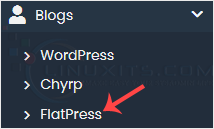
4. On the left side, locate the Blogs category. Click on it and then on the FlatPress link that appears. 
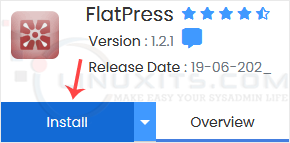
5. Click on Install. 
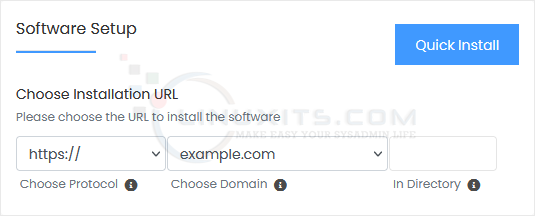
6. Fill in the necessary fields under the Software Setup fields:
- Choose Installation URL: Choose the appropriate protocol/domain. Inside the "In Directory" field, should you want to install this in a directory, i.e., example.com/directory, enter the directory name. Otherwise, please, leave it blank to install in your main domain, i.e., example.com.

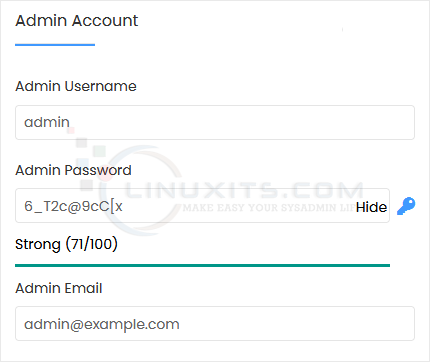
7. Under the Admin Account field, enter the following information:
- Admin Username: Your new FlatPress username (for security reasons, do not use the administrator or the admin username).
- Admin Password: Use a strong password.
- Admin Email: Your e-mail address.

Note: Copy the admin username and password to Notepad. You will need those to access the admin area of your FlatPress blog later.
8. Advanced Options: Leave this unless you want to change the database name or take an automated backup. Please, note that creating frequent backups may take a lot of disk space.
Finally, scroll down to the end of the page and click on Install. 
FlatPress is not just a powerful tool for blogging; it can also be a stepping stone towards building an online presence or even launching a successful business. In this article, we'll discuss how you can leverage the features of FlatPress to take your blogging journey to new heights.


