Step-by-step guide to installing a WordPress theme manually
Installing a WordPress theme manually can seem daunting, but with our step-by-step guide, you'll have your new theme up and running in no time. We break down the process into easy-to-follow instructions, complete with screenshots, so even beginners can successfully install their desired theme.
WordPress themes are the cornerstone of any successful website. But what if you want to install that theme manually? Or maybe you're not satisfied with the template provided and want to install another one. That's why we're here to provide some assistance, along with a few tricks—so you learn how to do it all yourself!
You can easily install a WordPress theme and activate it manually. Please, follow the steps below to do so.
1. Log in to the WordPress dashboard.
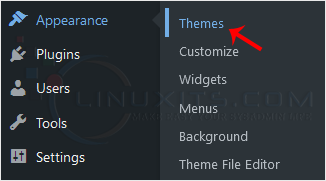
2. From the Dashboard menu, go to Appearance and click on Themes. 
3. Click on Add New. 
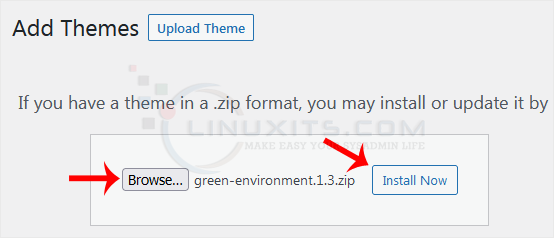
4. Choose Upload Theme. 
5. Click on Browse and choose the theme from your computer. Click on Install Now. 
6. It will take a few moments to install. After that, click on Activate. 
Congratulations, you have installed and activated a new WordPress theme.
By following our comprehensive guide on how to install a WordPress theme manually, you'll have the freedom to create a unique and visually stunning website that perfectly represents your brand or personal style.


