Over the years, developers have come up with a number of WordPress plugins that help you build websites faster and easier. Here are the steps to installing a WordPress Plugins. Installing a WordPress plugin can be a bit daunting. With so many plugins available, it can be easy to get lost in the sea of choice. Here is how you go about installing a WordPress plugin and what you might look for when choosing one to use.
WordPress plugins are very useful. You can easily install a plugin from the WordPress dashboard.
1. Log in to the WordPress dashboard.
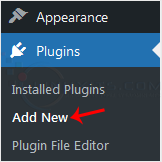
2. From the Dashboard menu, go to Plugins and click on Add New. 
3. Use the Search filter to find the plugins. Type Security to find plugins related to it. 
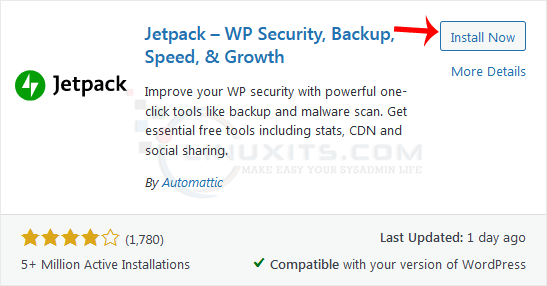
4. The available plugins matching the keyword Security will appear. Click on Install Now, next to the plugin's name. 
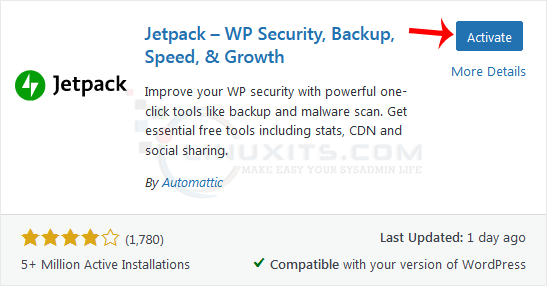
5. The installation can take a few moments. Once the Activate option appears, choose it. 
Note: After activating a plugin, a new menu of that plugin will be added to the Dashboard menu. If a plugin requires a setup, it will display an option to complete it.
By following these steps, you'll be able to easily install and optimize WordPress plugins, enhancing the functionality of your website while maintaining optimum security levels


