Step-by-step instructions to generate a full backup in Plesk
We understand that navigating through different software interfaces can be daunting. That's why our tutorial provides simple step-by-step instructions to help you easily generate a full backup in Plesk, ensuring that your data is securely stored.
Backing up is important, and you should do it regularly. Follow this tutorial to make a full backup of your website with Plesk.
How to Generate a Backup of your Plesk Account?
1. Log in to your Plesk account.
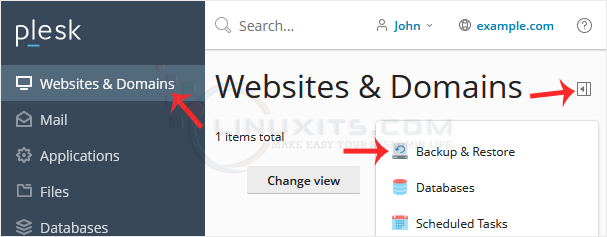
2. Go to Websites & Domains > Click on the Pull icon > Choose Backup & Restore.

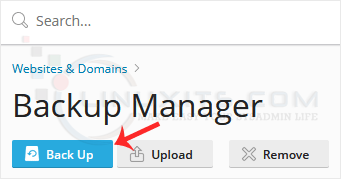
3. Under Backup Manager, click Back Up.

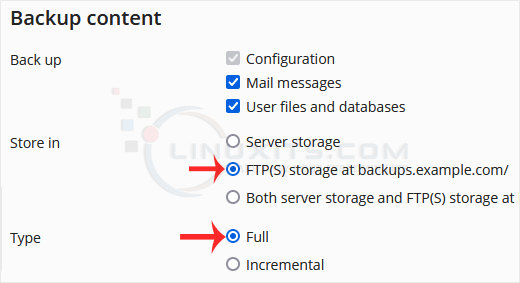
4. Choose Full as the backup type and FTP(s) in Store in option.

5. If you wish to receive a notification on backup completion, you can checkmark the "When a backup task is completed, send a notification email to" option.

6. Confirm with OK. The backup will start generating in the background. At this point, you can navigate away.
How to Download a Backup of Your Plesk Account?
1. Go to Websites & Domains > Click on the Pull icon > Choose Backup & Restore.
2. From the backup list, click the download icon.
![]()
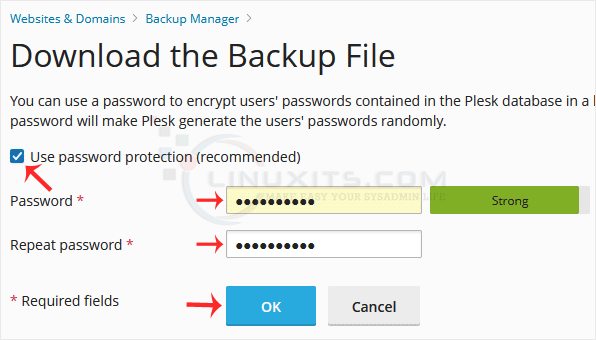
3. If you want to password protect the backup file, checkmark Use password protection and enter a password. Then confirm with OK.

4. A download will prompt you. Please, save the backup to your computer.
Protecting Your Website with Full Backups in Plesk
Generating regular full backups is not just a precautionary measure; it's an essential part of safeguarding your website's data and ensuring uninterrupted online presence. By following our step-by-step guide and implementing best practices, you can protect yourself from potential risks and confidently run your website with peace of mind.


