
One of the best ways to improve your website is by updating or reinstalling plugins. Updating or reinstalling WordPress plugins can be done in a variety of ways including: through the Wordpress dashboard, manually uploading and activating a new version, using FTP or SFTP to do it yourself and even removing every version history or undoing every update you've done since that last update. This article discusses how you can accomplish all these upgrades with only one plugin, WP-Optimize.
The WordPress plugin is not working correctly, or you want to reinstall it without losing data or removing the plugin.
You can do this with both active and inactive plugins.
1. Log in to the WordPress dashboard.
2. From the Dashboard menu, go to Plugins and click on Plugin File Editor. 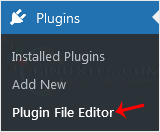
3. From the drop-down menu of Select plugin to edit, choose the plugin and click on Select. 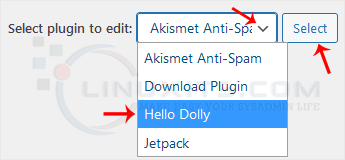
4. In the file editor, locate the version line: Version: 1.7.2 Change it to: Version: 1.7.1
Only change the version from a higher to a lower number. 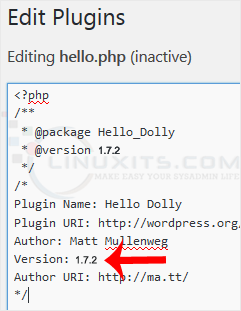
5. Scroll down and click on Update File. Then go back to the Installed Plugins list. There should be an update for the plugin you edited. Click on Update now. 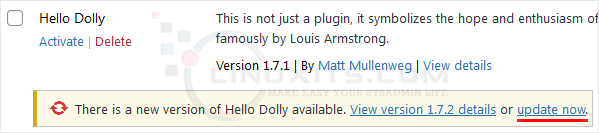
You have forcefully updated/reinstalled the plugin without losing data.
By following the steps and best practices outlined in this guide, you'll be well-equipped to forcefully update or reinstall WordPress plugins whenever necessary, giving you peace of mind and ensuring your website continues to thrive. Remember, HCL is here to provide expert IT support for all your web hosting needs, making your online presence as smooth and efficient as possible.
