
Step-by-step guide to enabling or disabling PHP extensions with the CloudLinux Selector
Enabling specific PHP extensions can enhance your website's capabilities and ensure optimal performance. In this tutorial, we'll walk you through the process of enabling PHP extensions using the CloudLinux Selector in cPanel, providing you with a seamless experience and allowing you to take full advantage of CloudLinux's features.
You can use CloudLinux Selector to enable or disable available PHP extensions in Plesk.
1. Log in to your Plesk account.
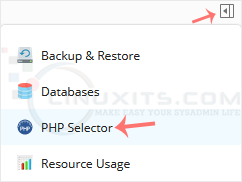
2. Click on the Pull icon in the right sidebar and choose PHP Selector.
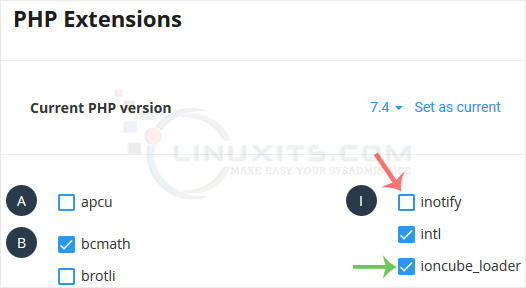
3. Click on the Extensions menu.

Note: If the Extensions page shows an error related to the native PHP version, change it to a non-native version first.
4. To enable the extension, checkmark the option you want to enable. Uncheck it if you want to disable it.
By following our comprehensive guide and harnessing the power of the Mailparse Extension, you can elevate your PHP projects to new heights, streamline email handling processes, and enhance overall efficiency and functionality in your Linux system administration tasks with CloudLinux Selector.
