
Understanding APIC, ACPI, and VNC in Virtualizor
Before diving into how to enable or disable these features, it's important to understand what they are and how they function within the Virtualizor platform. This article provides a comprehensive explanation of APIC, ACPI, and VNC, helping you make informed decisions about their usage.
Virtualizor allows you to enable or disable VNC, APIC, and ACPI.
1. Log in to your Virtualizor Control Panel.
2. From the left side panel, click on List VPS.

3. Hover your mouse on the appropriate VPS, and that line will be highlighted. Then click on the Manage icon in the highlighted line.

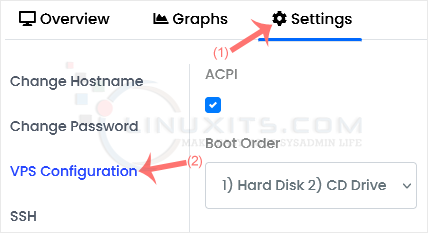
4. Click on the Settings tab and select the VPS Configuration.
5. Under the VPS Configuration option, should you want to enable VNC, tick mark VNC. You can do the same with ACPI and APIC.
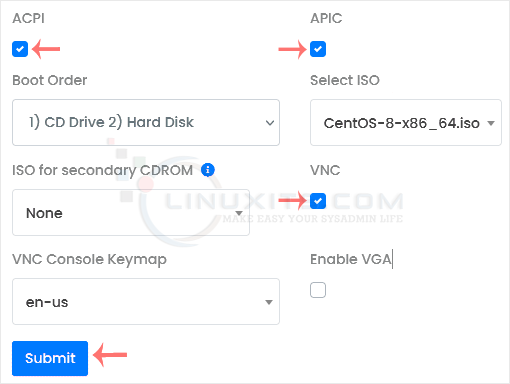
6. After making the changes, click Submit and reboot your VPS.
By following our comprehensive guide on enabling or disabling APIC, ACPI, and VNC in Virtualizor, you'll gain better control over your virtualization environment, enhance performance, and streamline your administrative tasks.
