Step-by-step guide: Enabling Cloudflare on your domain in cPanel
Cloudflare is a powerful content delivery network (CDN) that can greatly improve the speed and security of your website. In this tutorial, we will walk you through the process of enabling Cloudflare on your domain using cPanel, making it easier than ever to take advantage of its benefits.
1. Log in to your cPanel account.
2. In the Software section, click on Cloudflare.
![]()
3. Click on Sign in Here to access your Cloudflare account.

4. Under Domain Overview, it shows two options. CNAME Setup and Full Zone Setup.
CNAME Setup: You do not need to point DNS nameservers to Cloudflare. This makes it easier for you.
Full Zone Setup: You must change your domain nameservers to Cloudflare DNS.

For CNAME Setup: If you choose CNAME Setup, it will be activated immediately on your domain.

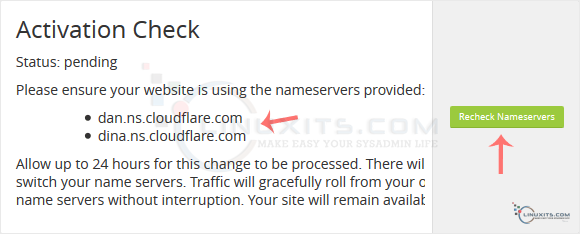
For Full Zone Setup: It will display nameservers, which you need to set on your domain name.

After updating your domain nameservers, wait for a few hours. Log in again to your Cloudflare account and click on Recheck Nameservers.
While enabling Cloudflare on your domain is relatively simple, having ongoing support from a trusted IT partner provides peace of mind and expert assistance whenever needed. Discover how LinuxITs can be your go-to resource for all your IT support needs, including Cloudflare integration and optimization.


