Step-by-Step Guide: Editing MX Records in cPanel
Need to update your email settings or switch to a new email provider? We've got you covered. Follow our easy-to-follow tutorial on editing MX records in cPanel, complete with screenshots and detailed instructions.
You can edit or remove an MX Record in cPanel using the cPanel's DNS Zone Editor. It allows you to manage, remove, or modify DNS records.
1. Log in to your cPanel account.
2. In the Domains section, click on Zone Editor. ![]()
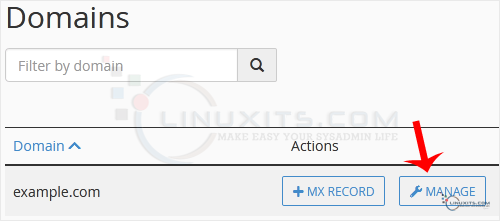
3. Under Domains, you can see many options below Actions. 
4. Click on Manage.
5. Locate the MX Record you want to edit or remove. To edit an MX record, click on Edit and modify the details. Then confirm with Save Record. Removing a record can be done with the Delete option. 
Note: It may take anywhere from 12 to 24 hours for the changes to take effect worldwide.
By following our comprehensive guide on editing or removing MX records in cPanel, you'll be able to efficiently manage your email delivery and ensure smooth communication within your organization. Trust LinuxITs for all your IT support needs!


