Step-by-Step Guide on Disabling Rescue Mode in Virtualizor
Disabling rescue mode is a straightforward process that can be done within the Virtualizor control panel. Follow our step-by-step guide to ensure a smooth transition from rescue mode back to normal operation, allowing your server and websites to function properly.
If you have previously enabled rescue mode but did not know how to disable it, follow this tutorial.
1. Log in to your Virtualizor Control Panel.
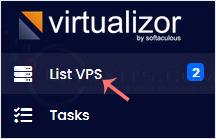
2. From the left side panel, click on List VPS.

3. Hover your mouse on the appropriate VPS, and that line will be highlighted. Then click on the Manage icon in the highlighted line.

4. Click on Rescue Mode.

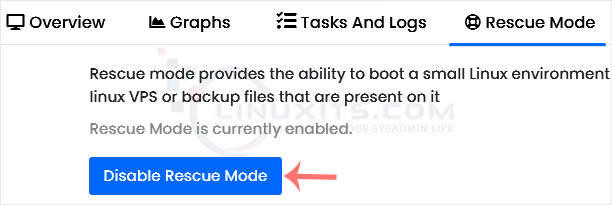
5. Click Disable Rescue Mode.

Your VPS will start in normal mode.
If Virtualizor shows that no actions are allowed you can click on the Reload this page icon to refresh your page. All actions will become visible after disabling rescue mode.
Beyond disabling rescue mode, learn additional tips and tricks for efficient server administration using Virtualizor. From optimizing performance to enhancing security measures, these insights will help Linux system administrators maximize their skills and keep their systems running smoothly.


