
Step-by-step guide to deleting the self-shutdown timer
If you find the self-shutdown timer in Virtualizor unnecessary or want to make changes to it, this step-by-step guide will walk you through the process. We'll provide clear instructions and screenshots to ensure a smooth deletion of the self-shutdown timer.
You can remove the self-shutdown timer in Virtualizor. Please, follow the steps below to remove the self-shutdown timer.
1. Log in to your Virtualizor Control Panel.
2. From the left side panel, click on List VPS.

3. Hover your mouse on the appropriate VPS, and that line will be highlighted. Then click on the Manage icon in the highlighted line.

4. Click on the Self Shut Down.
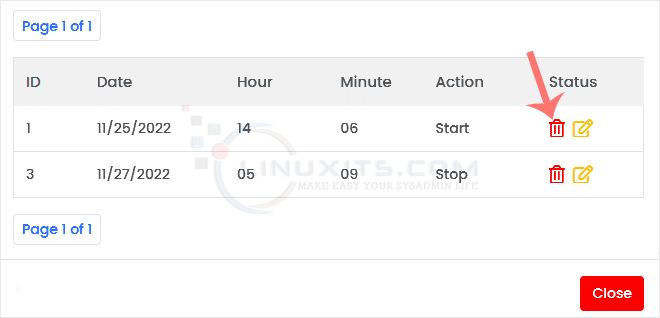
![]()
5. If you have multiple timers, hover your mouse on the appropriate one, and that line will be highlighted. Then click the Delete button in the highlighted line.
6. When asked, confirm with OK.
Deleting or disabling the self-shutdown timer in Virtualizor can provide more flexibility and control over your virtual machines. By following our comprehensive guide and understanding how this feature works, you'll be able to confidently make changes based on your unique requirements as a Linux system administrator or software engineer using LinuxITs resources
