
Step-by-step guide to creating scheduled tasks in Plesk
Plesk is a powerful web hosting control panel that allows you to automate various tasks on your Linux server. In this tutorial, we will walk you through the process of creating scheduled tasks in Plesk, enabling you to easily automate routine operations and save time.
Follow this tutorial to create Scheduled Tasks (Cron Jobs) in Plesk.
1. Log in to your Plesk account.
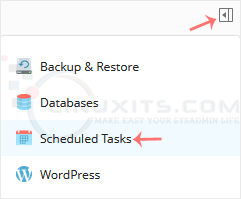
2. Click on the Pull icon in the right sidebar and choose Scheduled Tasks.
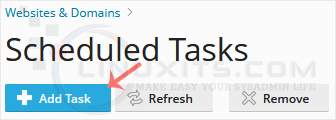
3. Under Scheduled Tasks, click on Add Task.
4. Enter the following details:
Webspace: Choose the appropriate domain from the drop-down menu in case of multiple domains.
Task Type: Choose the appropriate option as per your needs.
Command/Script Path: Depend on your choice. If you choose Task type to Run a command, then enter a command.
Run: To run your command every day, choose Daily and enter time and hour.
Description: Type the description of the task.
Notify: Select Errors only or leave it as it is.
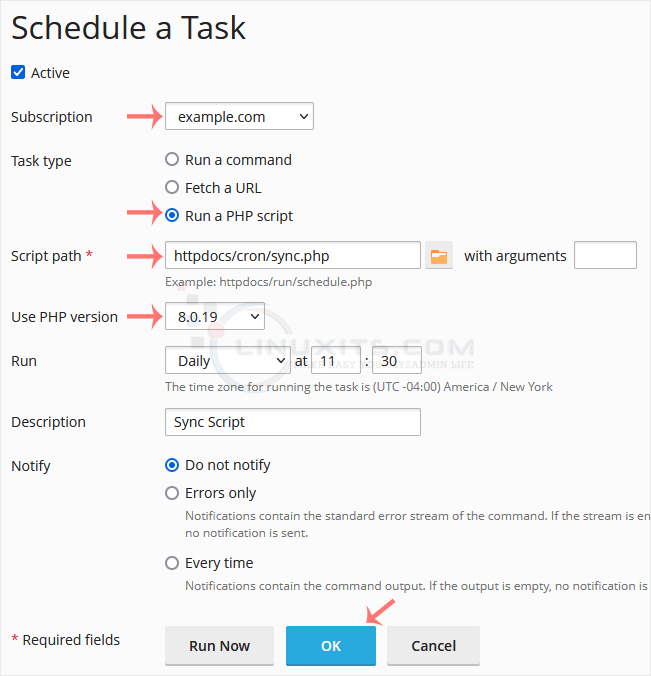
5. Click OK.
Your task will be scheduled. Click on Run Now to verify the task.
Remember that LinuxITs is your go-to resource for Linux tutorials, tips, and tricks. Whether you're a CEO or a Linux system administrator, our blog provides valuable insights to help improve your skills and make the most out of Linux technology. Stay tuned for more informative articles!
