
Step-by-step guide: Creating an additional web disk account in cPanel
In this comprehensive guide, we'll walk you through the process of creating an additional web disk account in the cPanel control panel. Whether you need to add storage for your growing business or want to grant access to specific team members, this tutorial will provide clear instructions and screenshots to make the process easy.
You can use the cPanel's login details to access your Web Disk. You can also create an additional account for accessing a specific directory on your account.
1. Log in to your cPanel account.
2. In the Files section, click on Web Disk. ![]()
3. Under Create an Additional Web Disk Account, enter the details of the new account you wish to create.
Username: Enter a username such as folderx.
Password: Enter your new password or click on Password Generator to generate a random password.
Directory: You can leave it blank, but it will allow access to the whole directory. Enter the directory location, such as public_html/folderx. The user will only have access to the directory path /folderx.
Permissions: Select your option. 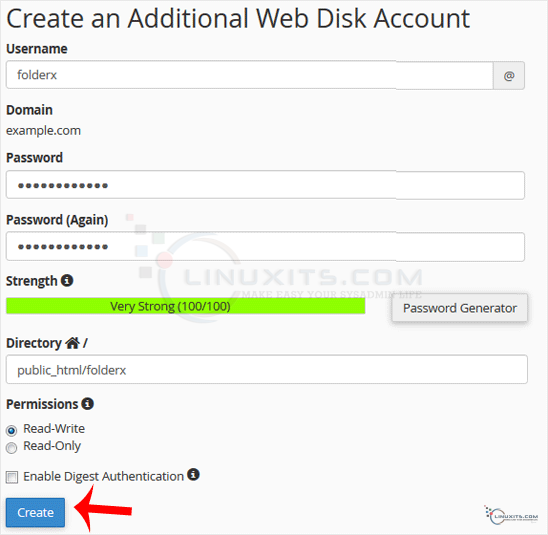
Note: If you use the Windows OS, mark Enable Digest Authentication. However, if the server has an SSL certificate signed by a recognized certificate authority and you can make an SSL connection over port 2078, you do not need to enable this.
4. Now click on Create. You can use the new login details to access your Web Disk account.
By following these steps, you'll be able to seamlessly create an additional web disk account in cPanel with ease! Having multiple accounts can help streamline file management processes and improve overall efficiency within your IT infrastructure.
