Step-by-step guide: Creating a database in Plesk
In this comprehensive tutorial, we walk you through the process of creating a database in Plesk, a powerful web hosting control panel. From accessing the Plesk interface to configuring the necessary settings, our step-by-step guide ensures that even beginners can easily create and manage their databases.
You can create a database in Plesk by following this tutorial.
1. Log in to your Plesk account.
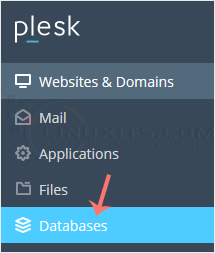
2. Click on Databases from the Sidebar Menu.

3. Click on Add Database.

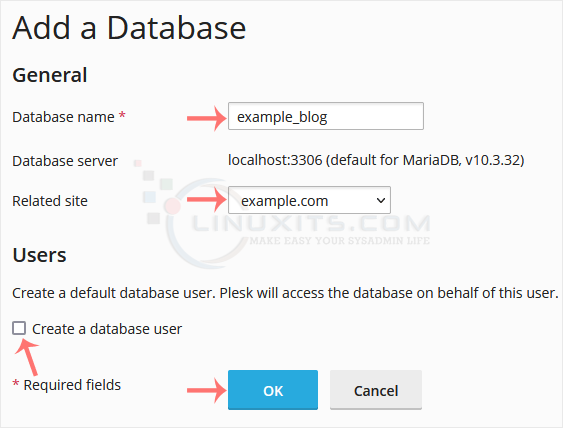
4. Under Add a Database, fill in the following details:
Database Name: Your database name, such as blog.
Related Site: Choose an appropriate website from the drop-down menu.
Users: Uncheck Create a database user, and confirm with OK.

A success message will be displayed, indicating that your database has been created.
Creating a database in Plesk is just the beginning of your journey into the world of databases. To stay ahead of the curve and make the most of modern database technologies, we'll provide recommendations on valuable resources such as books, blogs, forums, and training courses that can help further enhance your knowledge and skills.


