
Step-by-step guide to changing your hostname in Virtualizor
Changing the hostname in Virtualizor can be a daunting task, but with our easy-to-follow guide, you'll have it done in no time. We break down each step, providing clear instructions and screenshots to ensure a successful hostname change.
You can change the hostname in Virtualizor.
1. Log in to your Virtualizor Control Panel.
2. From the left side panel, click on List VPS.

3. Hover your mouse on the appropriate VPS, and that line will be highlighted. Then click on the Manage icon in the highlighted line.

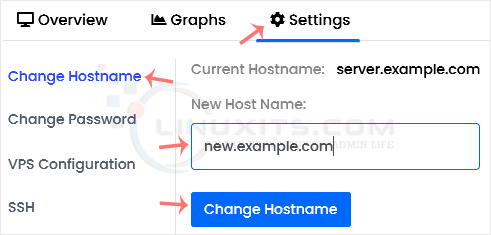
4. Click on the Settings tab and select the Change Hostname. Enter your new hostname and click on Change Hostname.
5. Reboot the VPS to apply the changes.
Taking control of your system with hostname changes in Virtualizor
In this concluding section, we summarize the key takeaways from our guide on changing hostnames in Virtualizor. By taking control of your system's hostname, you empower yourself to create a secure and efficient virtualization environment that meets your unique needs.
