Step-by-step guide: Adding an "A Record" in cPanel
Learn how to add an "A Record" in cPanel with this easy-to-follow tutorial. We provide clear instructions and screenshots to help you navigate through the process seamlessly, ensuring that your DNS settings are correctly configured.
The "A record" is a DNS record used for pointing a domain or a subdomain to an IP address. You can add A A Record using the cPanel's Zone Editor option.
1. Log in to your cPanel account.
2. In the Domains section, click on Zone Editor. ![]()
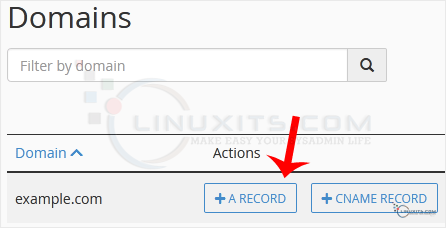
3. Under Domains, you can see many options below Actions. 
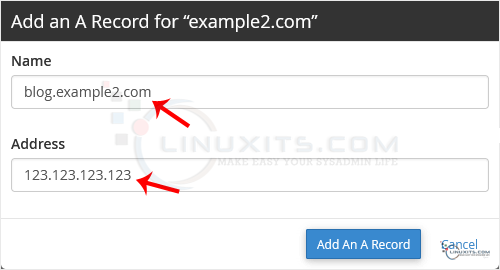
4. Click on A Record, and a pop-up box will open. Please, enter the required details in it.
Name: Enter the name you want to add. For example, enter blog and the cPanel will automatically add a domain name such as blog.example.com.
Address: Enter the IP Address of the server.

5. Now click on Add an A Record.
Congratulations, you have successfully added A Record. The DNS propagation can take up to 24 hours.
Note: It may take anywhere from 12 to 24 hours for the changes to take effect worldwide.
By following these simple steps, you can easily add an "A Record" in cPanel and ensure that your website functions smoothly with proper connectivity and domain settings.


