Step-by-step guide to adding a new domain in Plesk
Adding a new domain in Plesk can be a daunting task for beginners, but with our step-by-step guide, you'll be able to do it with ease. We walk you through the entire process, from accessing the Plesk control panel to configuring DNS settings for your new domain.
Follow this tutorial to add a new domain to your Plesk account.
1. Log in to your Plesk account.
2. Click on Websites & Domains from the Sidebar Menu.

3. Click on Add Domain.

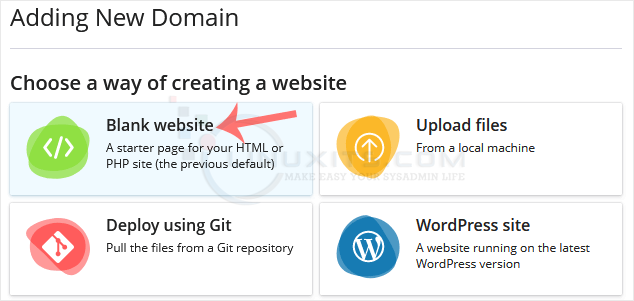
4. Please, choose Blank Website as an option.

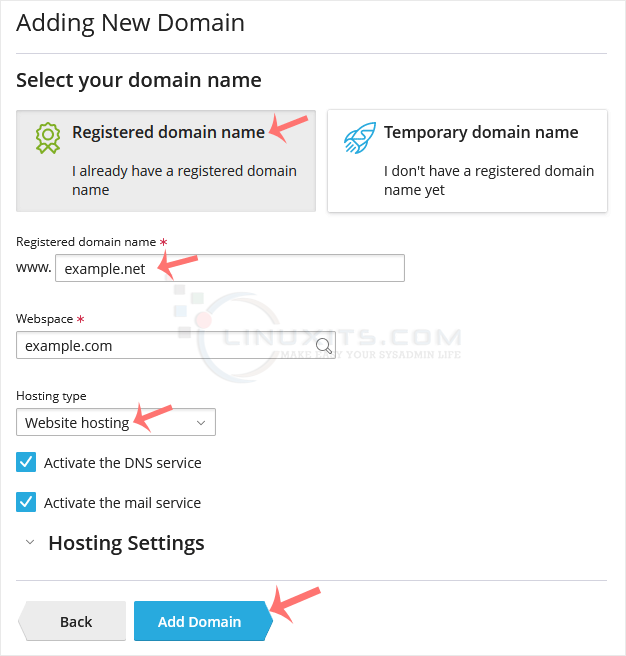
5. In Adding New Domain, enter the following details:
- Select your domain name: Choose the Registered domain name option. If you don't have a domain, choose Temporary domain name.
- Registered domain name: Enter your domain name.
- Hosting Type: Select Website Hosting from the drop-down menu. You can leave all other options as they are.

6. Click on Add Domain.
Once your domain is added, you can manage it from the Websites & Domains option.
Adding a new domain is just the beginning of your online business journey. We share best practices for ongoing domain maintenance in Plesk, including regular updates, security audits, and performance monitoring to ensure that your websites continue to thrive.


