
Step-by-Step Guide to Adding a CNAME Record in cPanel
Adding a CNAME record in cPanel is a straightforward process that can be done in just a few simple steps. This comprehensive guide will take you through each step, complete with screenshots and easy-to-follow instructions, ensuring that you can successfully add a CNAME record without any hassle.
CNAME records are referred to as alias records since they map an alias to its canonical name. You can add a CNAME Record using the cPanel's Zone Editor option.
1. Log in to your cPanel account.
2. In the Domains section, click on Zone Editor. ![]()
3. Under Domains, you can see many options below Actions. 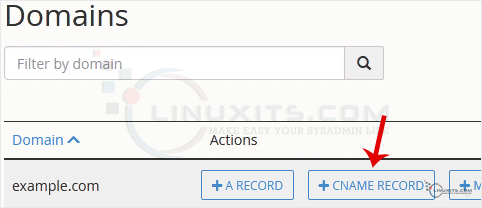
4. Click on CNAME Record, and a popup box will open. Please, enter the required details in it.
Name: Enter the name you wish to add, such as www, and the cPanel will automatically add a domain name like www.example.com.
CNAME: Enter the domain name. 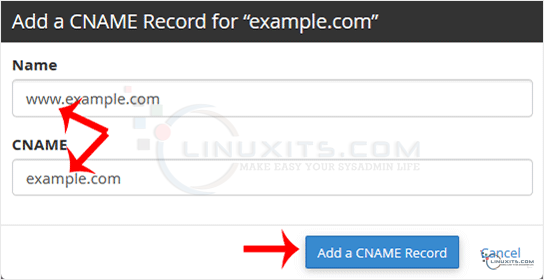
5. Now, click on Add a CNAME Record.
If the record is added successfully, you will see a success message.
Note: It may take anywhere from 12 to 24 hours for the changes to take effect worldwide.
By following this helpful guide, you'll be able to confidently add a CNAME record in cPanel, enhancing your website's functionality and providing seamless navigation for your visitors. Remember that LinuxITs is always here to support you with any IT support needs along the way.
