Step-by-step guide for VPS access via VNC in SolusVM
Accessing your Virtual Private Server (VPS) through a graphical user interface (GUI) can be essential for certain tasks. With our detailed tutorial, you'll learn how to easily access your VPS using Virtual Network Computing (VNC) within the SolusVM control panel.
You can access your VPS via VNC in an emergency, such as when a firewall blocks your IP, the Internet connection on the VPS is not working, and when you cannot access SSH. Also, you can use VNC for OS installation/reinstallation.
1. Log in to your SolusVM Control Panel.
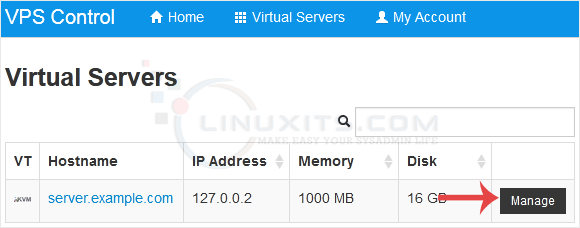
2. If you have multiple VPSs, select the appropriate one. 
3. Click on VNC. 
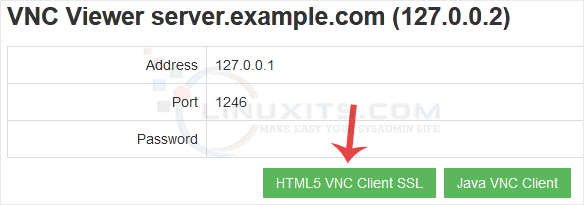
4. The new VNC page will open. Click on HTML5 VNC Client SSL(Recommended) or Java VNC Client. 
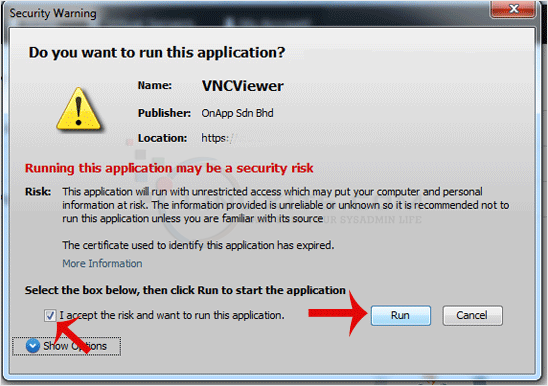
5. With HTML5 VNC, it shows VNC directly. For Java VNC, accept security warnings if prompted and click on the Run button. 
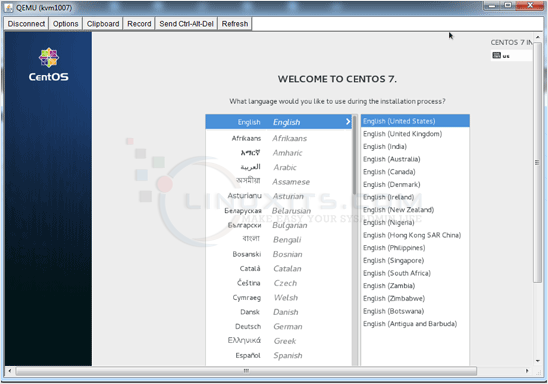
The VNC Area will resemble the following screenshot: 
Note: If you get an error such as Java Blocked, white-list our VPS control panel domain in your Java Security List. If you don't have Java, install it on your computer.
By following these step-by-step instructions and leveraging the power of SolusVM's features, you'll have no problem accessing your Linux-based Virtual Private Server (VPS) via Virtual Network Computing (VNC). Unlock the full potential of your VPS and enjoy seamless remote control for all your Linux system administration and software engineering needs with LinuxITs.


